Showing posts with label Recipes. Show all posts

Wednesday, May 28, 2014

Here's to Mushrooms!

One of my recipes is being featured by Mushroom Mondays.  I'm feeling very proud!


And hungry ~ don't these look good?  These babies are so photogenic!

Monday, May 28, 2012

Meatless Mondays: Summer Fun

And we're back to Monday...  How did that happen?  I hope all my readers have been enjoying the holiday weekend.  For me, it's just one more reminder that summer is nearly here.  (Yippee!)  I plan to savor this summer.  Partly to distract me from the heat that could be the bane of my existence.  And partly because this summer will likely be a very special summer.  

I'm between jobs right now, so I will be planning lots of activities and quality time with my big munchkin.  Baby munchkin is due to arrive in early August, so that will be huge.  In between I'm hoping to fit in a trip or two, lots of dinners on our back patio, many afternoons spent poolside, and maybe even a day or two at the beach.


To get it all started, I recently discovered what may become this year's favorite summer pasta.  It's another tortellini dish that can be served warm, room temperature, or cold as a pasta salad.  I took it to a cookout as a side dish yesterday, and I heard a few "yums" amid all the noshing.  Always a good sign!   


Notice that the ingredient list is decidedly low-fat, making this sauce yet another example of a sneakily-lowcal cream sauce.  Just remember to watch how long this dish sits out on the back patio, as it can spoil as quickly as any salad dressed with a cream-, buttermilk-, or mayo-based sauce.

~~~~~~~~~~~~~

Tortellini with Yogurt Chive Sauce
Serves 4-6
  • 1 pound fresh or frozen cheese tortellini
  • 8 oz. frozen peas
  • 2/3 plain lowfat yogurt
  • 1/2 cup Parmesan (either grated or shredded), divided
  • 2 cloves garlic, minced
  • 2 tablespoons roughly chopped chives
  • 1/2 teaspoon salt, plus additional for the pasta water and to taste
  • 1/4 freshly ground black pepper
  • 1 tomato, diced
Cook the tortellini in a pot of well-salted boiling water according to the package directions.  Add the peas to the boiling water during the last 3-4 minutes of cooking time.  (Note that fresh tortellini may only need 3-4 minutes to boil, in which case you can add the tortellini and peas together from the start.)  Reserve 1/2 of the pasta cooking water before draining.

In the meantime, mix the yogurt, 1/4 cup Parmesan, Garlic, chives, 1/2 teaspoon salt, and pepper in a small bowl.  Place the cooked pasta and peas in a large bowl.  Add the diced tomato and sauce.  Mix well.  Use some of the reserved pasta water to thin out the sauce, if needed.  Add additional salt and pepper to taste, then sprinkle with the remaining 1/4 cup Parmesan.  Serve warm, room-temperature, or chilled as a pasta salad.

Saturday, May 19, 2012

Meatless Mondays: Planning Ahead!

I'm trying to get back to my regular Meatless Mondays posts, but I keep noticing it's Monday evening and I've forgotten to post.  Again.  So this week I'm planning ahead and offering you my Meatless Monday idea far enough ahead of time that you could actually make it.  On Monday, no less!

I know we're heading towards summer, but this last week in NorCal offered a little break in the warmer temperatures we were having.  We had a breeze on several evenings, and soup actually seemed like appropriate dinner fare.  Truthfully, I find that soup isn't such a terrible warm-weather supper because it's so light and easy on the tummy.  (And waistline!)  


I love this recipe because it's so adaptable.  The essential elements are the onion, mushrooms, broth, and tortellini.  When the cupboards are bare, you could throw together only the essential items for a simpler version.  You could fancy it up with additional colorful veggies and extra herbs.  Or, you could streamline it for a busy weeknight by using store-bought diced onions and some frozen veggies rather than chopping your own.  As you can see, the version I made last week was fairly chunky and loaded with veggies.  We ate it with cheese bread and salad, and I made a double batch so that I can freeze some for later!


~~~~~~~~~~~~~~~~~

Mushroom Tortellini Soup
Serves 4-6
Cook time: about 45 minutes
  • 1 tablespoon olive oil
  • 1 teaspoon dried thyme
  • 1/4 teaspoon red pepper flakes
  • 3 cloves of garlic
  • 1 small onion, chopped small
  • 1/2  red bell pepper, chopped small
  • 2 carrots, peeled and chopped small  (or you can substitute other veggies, even frozen veggies, for the carrots and bell pepper - use about 1 1/2 cups)
  • 2 medium portabello mushrooms,chopped into cubes
  • 1/4 cup red wine (optional)
  • 1-14 oz can diced tomatoes, undrained
  • 1-14 oz can white kidney beans (or cannelini beans), drained and rinsed
  • 1 cup of water
  • 1 quart vegetable stock
  • 1-9 oz package fresh or frozen tortellini (filled with cheese, muchroom, or other complimentary filling)
  • Garnishes of your choosing, such as parmesan cheese, fresh herbs, sour cream, or garlic croutons.

Heat the oil in a dutch oven over medium heat.  Add the thyme, red pepper flakes, and garlic, then saute for 1 minute.  Add the onion, red bell peppers, and carrots, then saute until they are beginning to soften.  (5-8 minutes)  Add the portabello mushrooms, and season with salt and pepper to taste.  Let the veggies saute another 5-8 minutes until the mushrooms have released some of their juices and are starting to brown.

Use the win to de-glaze the bottom of the dutch oven.  Add the canned tomatoes, beans, water, and stock.  Bring the soup to a boil, then simmer for about 8 minutes.  Add the tortellini, and cook according to the package directions.  (Fresh takes approximately 4-7 minutes, frozen takes approximately 6-9 minutes.)  Adjust salt and pepper to taste.  Garnish and serve.

Monday, May 7, 2012

Meatless Mondays: Start it out right!


I am a huge believer in breakfast, probably because my body seems to be programmed to eat a full meal within a few hours of waking up.  (I wake up hungry, people, hungry!)  In my experience, it's important to eat healthy (and hearty!) in the morning to start a day out right. 

As a vegetarian, I also find it's important to be sure there's a decent dose of protein in every meal, including breakfast.  Don't be fooled - "vegetarian protein in the morning" does not necessarily have to mean eggs.  In fact, I find that I can get a nice dose of protein simply by eating whole grains. 

This weekend I whipped up my first batch of baked oatmeal, which I've been reading about all over the internet.  I used a very basic recipe, and I look forward to jazzin' it up in future versions with some dried or fresh fruit and other flavor combinations. 

Oatmeal has a nice dose of protein built right in, plus it makes a great base to combine with other protein sources.  By my count a serving of this baked oatmeal recipe has about 5 grams of protein (based on a 12-serving recipe), which isn't bad for something that smells as good as a freshly baked oatmeal cookie! 

This morning I had it with yogurt and berries, which was great.  Tomorrow I might try it with warm milk, which I imagine will be closer to a true bowl of oatmeal.  The oatmeal-dairy combo puts my protein tally closer to 12 grams, which I consider to be quite respectable for breakfast.

In case I'm selling this stuff short, this recipe is truly enticing!  It absolutely smelled like a cookies as it baked.  I was thrilled when it won over my hubby, who typically turns his nose at traditional oatmeal.  Plus, it satisfied my morning sweet tooth without being quite as sweet as an actual cookie.  I'm the queen of leftovers, so I was doubly pleased to discover how well it warmed up in the toaster oven the next day.  Yay for a week of baked oatmeal!


Baked Oatmeal - the Basic Recipe
Serves 8-12

  • 3 cups oatmeal
  • 3/4 brown sugar
  • 1/2 cup butter, melted
  • 2 eggs, lightly beaten
  • 2 cups milk
  • 2 teaspoons baking powder
  • 1 teaspoon salt
  • 1 teaspoon vanilla
  • 1 teaspoon cinnamon
Preheat the over to 375 degrees.  Mix all of the ingredients together.  Pour into a buttered 13 x 9 inch pan.  Bake at 375 degrees for 25 minutes.

Saturday, March 17, 2012

A Nod to St. Patty's Day


I won't comment on the fact that I barely post anymore.  Really, I won't.  I also won't comment on the fact that this blog has become a holiday blog, at best.  Nobody wants to read about my regrets or my promises to do better, right?  OK, good.  I'm glad we're clear on that.

This year St. Patrick's Day is all about beer at our house.  My home-brewing hubby decided to host a home-brew day with buddies from his home-brew club. Can you tell there's a lot of home-brewing happening around here these days?

I wanted to pay a tiny tribute to St. Patrick's Day, and I figured the best way to get a bunch of home-brew guys on board was to . . . well, add some home-brew of course.  So, out popped this chocolate stout cake.


All I did was pull a chocolate cake mix from my cupboard and replace the milk with my hubby's home brewed stout.  The package called for 1 1/4 cups of liquid, so there was quite a bit of beer in my version.  It was a little frothy as it mixed up, and you could definitely smell the aroma of the stout as it cooked.


I didn't want the beer to be overpowering, so I topped it with a straight-up chocolate frosting.  I used the frosting recipe on the cake mix box, which turned out to be extra chocolate-ly.  This recipe is definitely a keeper.


~~~~~~~~~~~~

Chocolate Frosting
Makes enough to ice 2 - 9" x 13" cakes or a 2-layer cake

  • 1/2 cup (1 stick) of butter, softened
  • 2/3 cup baking cocoa
  • 3 cups powdered sugar
  • 1/3 cup milk
  • 2 tbsp. brewed coffee
  • 1 tbsp. vanilla

Mix the butter, coffee, vanilla, and cocoa until blended.  Add in sugar and milk, alternating between the two as you mix on medium speed.  Then mix on medium-high for 2 minutes.  Spread the frosting on your cake. 

Tuesday, February 14, 2012

Valentine's Day 2012

This year my daughter and I planned ahead for Valentine's Day.  She was supposed to take some treats to share at her school party, so we pulled out an old favorite and updated it.  A few years ago we made pretzel sticks dipped in chocolate and fancy Valentine sprinkles.


This year my little munchkin decided that the traditional pretzel shape is so much more appropriate because it looks like a heart.


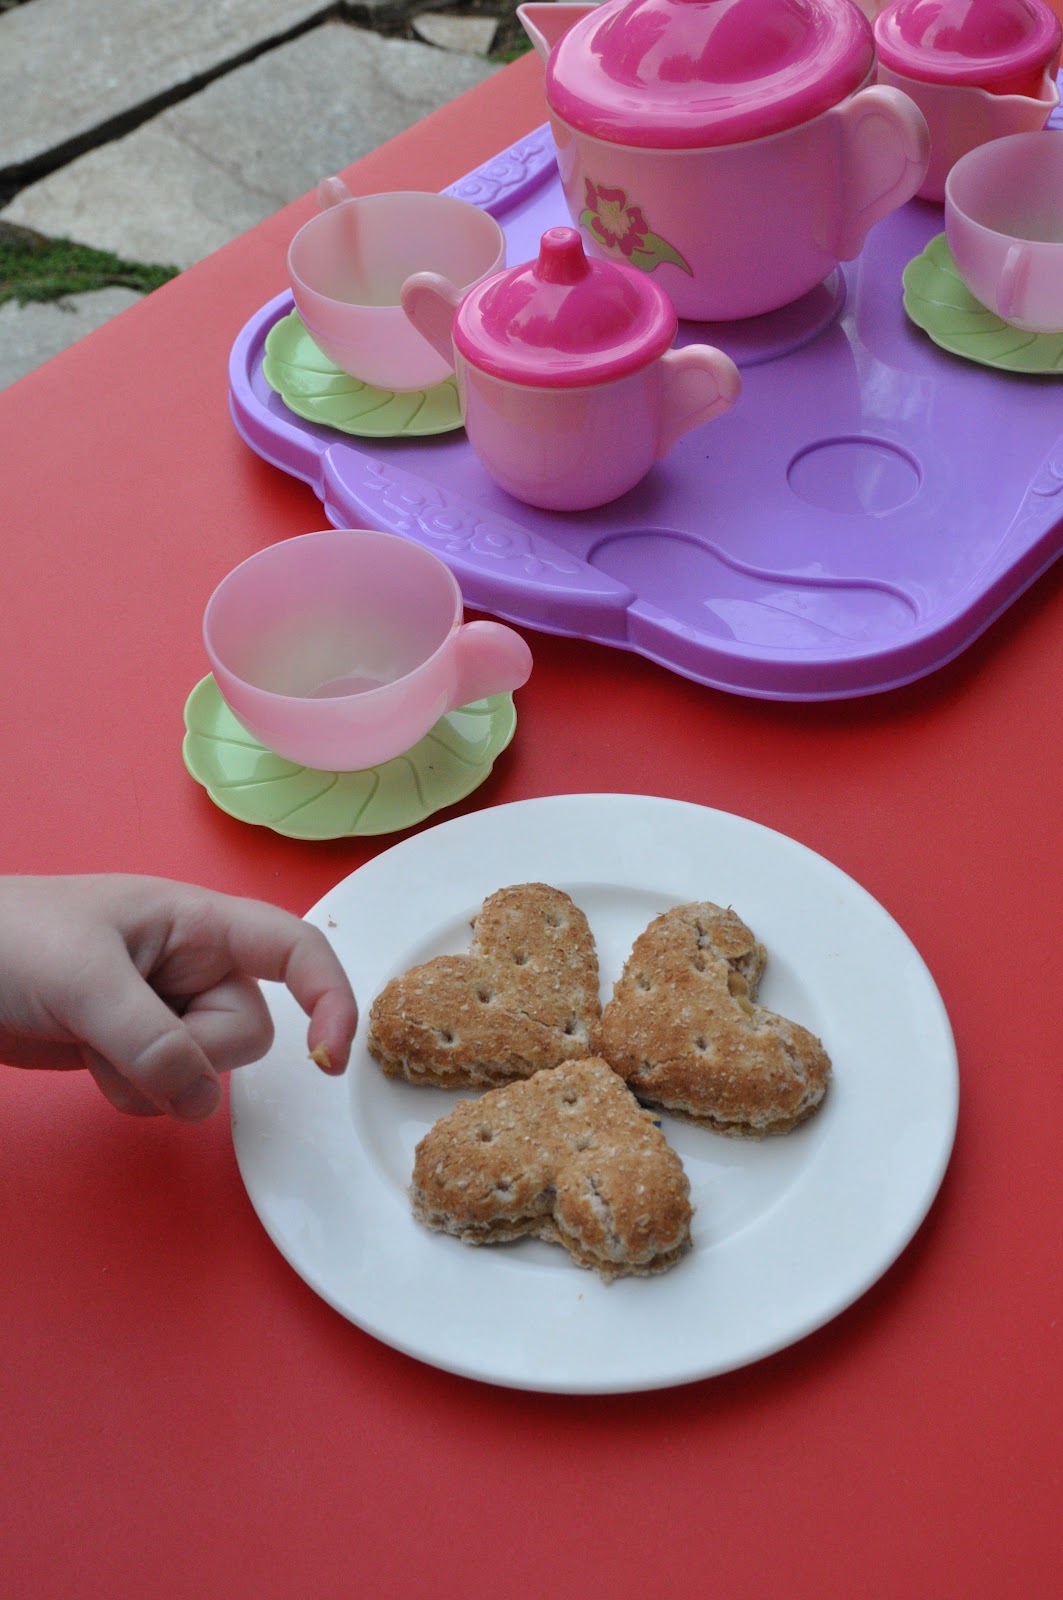
This morning she headed to school with a tray full of treats to share with her friends and teachers.  She probably doesn't know it yet, but I also sent her some of these peanut butter sandwich hearts for her snack.  Cute, right?


But back to the pretzels . . .  If you feel like sharing some chocolate with your honey (big or small), these are super easy to make.


Chocolate Covered Pretzels
  • 1 tsp. canola oil
  • 1 cup chocolate chips (I prefer dark chocolate)
  • About 35-40 pretzels  (I used lightly salted)
  • Sprinkles

Place the oil and chocolate chips in a microwave-safe bowl, and put the bowl in the microwave.  Microwave on high for forty-five seconds, then stir well.  Repeat several times until the chocolate is completely melted.

Add several pretzels at a time to the bowl, submerging them in the chocolate.  Lift the pretzels out one at a time with a fork.  Place the pretzels on a cooling rack sitting over a tray so that the excess chocolate can drip off.  Sprinkle the pretzels with sprinkles, if using, within a few minutes while the chocolate is still moist.

Once your tray is full, place it in the fridge for about 30 minutes to set.  After the chocolate has hardened, carefully lift each pretzel off the rack one-by-one by reaching underneath the pretzel with your fingers and gently dislodging it from the rack.  Be careful as you do this last step, as some of the pretzels may break.  (I made extra for this reason.  We kept the broken ones to munch on at home and sent the pretty ones to share at school.)

Sunday, February 12, 2012

On Counting Carbs . . . and Eating Them Too

For reasons I am not yet ready to reveal to the Internet, I recently had to start counting carbs and watching my diet.  In a nutshell, it’s not fun.  I have always been a very healthy eater, but there’s something about being told I have to eat healthy that is just so . . .  well, annoying.  Nevertheless, I have committed to following the rules.  Most of the time, anyway.  When I do feel like cheating, it will most definitely be for chocolate.

At our Superbowl party last weekend I cheated with these brownies.  They have less flour and less sugar than your average brownie.  The chocolate flavor really shines through from the Dutch-processed cocoa, which is supposedly more flavorful than your run-of-the-mill cocoa powder.  


These brownies also have a nice dose of salt, and I have to admit I find the sea salt and chocolate combo to be downright mouth-watering.  Initially I made a version with all of the salt inside the batter, but I think the crunchy topping makes for a nice finish. 


If you happen to be watching your carb (or calorie) intake, give these brownies a try.  I hope to cheat with them again soon!

Lower Carb Chocolate Sea Salt Brownies
Makes 16 brownies
  • 1 teaspoon instant espresso powder
  • 2 teaspoons vanilla extract
  • ½ cup unsweetened cocoa (preferably Dutch-process for a flavor boost)
  • ½ cup all-purpose flour
  • 1 ¼ teaspoons sea salt, divided
  • ¼ teaspoon baking powder
  • 1 cup sugar
  • ¼ butter
  • 2 large eggs
Preheat the oven to 350 degree F.  Grease an 8-inch square metal baking pan.

In a cup, dissolve the coffee in the vanilla extract.  In a small bowl, combine the cocoa, flour, ¾ teaspoon sea salt, and the baking powder.  Then in a medium bowl, whisk the sugar, vegetable oil spread, eggs, and coffee mixture until well-mixed.  Then blend in the flour mixture.  Spread the batter in the prepared pan.  (It will be a thick batter.)  Lastly, sprinkle the remaining ½ teaspoon sea salt over the brownies.

Bake for approximately 22 to 24 minutes, or until a toothpick inserted approximately 2 inches from the edge of the pan comes out almost clean.  Place the pan on a wire rack and cool for approximately 2 hours.  Enjoy!

Tuesday, December 14, 2010

The Winter Burn


Last weekend I watched an episode of one of Giada De Laurentiis' shows. I loved her theme for the episode ~ her idea is that spicy food is great for warming up the winter chill! This got me thinking. Many of my favorite winter meals are in fact spicy. Here are a few of my faves:
Yesterday I adapted one of the recipes from Giada's show ~ pasta with eggplant sauce. This is some of the best pasta I have had in a very long time. I'll share it with you soon.

Sunday, December 12, 2010

Meatless Mondays: More on Muffins

{Photo from here}

In the last few weeks I've mentioned my (and my preschooler's!) new love for hearty muffins as an afternoon snack. This muffin started it all. The recipe calls for peanut butter to replace some of the butter. It is sweetened with maple syrup and chocolate chips. And they are made with whole wheat flour. These are more than your average muffin because the peanut butter and whole grains really boost the protein and fiber.

Oh, and did I mention how yummy they are? The chocolate chips poking out of the top of the muffins entice my daughter every time. We have some in our freezer now!

Monday, December 6, 2010

Meatless Mondays: Pumpkin Cornbread


Last week I mentioned that the new favorite snack around my house is the {muffin}, and this recipe was a truly great find. These are hearty, sustaining, even long-winded. They are whole grain, for a boost of protein and fiber to make you feel full, and the subtle honey flavor makes them absolutely scrumptious. Just like the little cakes Alice eats in Alice in Wonderland! They taste best the first day, or frozen immediately after cooling and re-heated later. Yum!

Pumpkin Cornbread
Adapted from Simply Vegetarian
  • 1/2 c. soft butter
  • 3/4 c. honey
  • 2 eggs, beaten
  • 1 15 oz. can pumpkin
  • 1 cup milk
  • 1 1/2 cups whole wheat pastry flour (or regular whole wheat flour)
  • 1 c. cornmeal
  • 1 Tbsp. plus 2 tsp. baking powder
  • 1 tsp. cinnamon
  • 1/2 tsp. allspice
  • 1/2 tsp. salt
  • 1/4 tsp. ground ginger
Preheat the oven to 350 degrees, and butter a 12-cup muffin tray. Cream the butter and honey in a bowl. Add the eggs, pumpkin, and milk, then mix well. In a separate bowl, combine the remaining ingredients. Add the dry ingredients to the pumpkin mixture and mix thoroughly. Fill the muffin cups 3/4 full, then bake for 15-20 minutes. Enjoy!

Monday, November 22, 2010

Meatless Mondays: Thanksgiving Favorites


Hi All! I know it's been a while, but it's only fitting that Thanksgiving should bring me (ahem) back to the table.

I'm happy to report that Thanksgiving is a holiday for vegetarians and meat-eaters alike. I discovered some of my favorite recipes while planning Thanksgiving menus. I think the best vegetarian main course are those that the meat-eaters are likely to dig into, too. Here are a few of my faves:
Enjoy, and I plan to see you back here real soon!

Thursday, September 16, 2010

So Saucy

{Green Bean Casserole}

I have a new secret sauce. I think it's pretty great, but my hubby absolutely loves it. He's always had a taste for creamy sauces ~ alfredo, bechamel, creamy pesto. Basically, if there's cream in it he loves it. Of course this hasn't always worked out so well for him. I mean, a busy dad can only squeeze in so many runs to stay ahead of the cream sauces. You know what I mean!

This creamy sauce isn't actually creamy ~ its texture comes from someplace other than cream. It has very little fat and lots of flavor, not to mention a dose of protein and fiber. So far I've used it with veggies and as a pasta sauce. Success, success, success! I plan to continue adapting this recipe for as many uses as I can. Tonight I'll share my basic recipe, and I'll share a few of my variations soon.

Consider trying it out. I think you'll be surprised how flavorful and satisfying it is ~ especially when you don't feel like running off a real cream sauce!

~~~~~~~~~~~~

Garlic and Herb "Cream" Sauce
  • 1 15 oz. can canellini or white kidney beans, undrained
  • Up to 2 cloves of garlic, minced
  • Up to 2 tsp. of dried herbs (try thyme, rosemary, oregano, parsley, or a combination)
  • 1/4 tsp. salt
  • 1/4 tsp. pepper
  • 1 Tbsp. olive oil
Place all ingredients in a blender (or use a hand blender) and blend until the sauce is smooth and creamy. It's that simple!

Friday, September 10, 2010

Pizza Remix 3

It's been a while since I blogged a Remix recipe. These are my simplest, easiest, most basic combinations of ingredients. I love to re-create tacos, pizza, and sandwiches in new or different forms. Very often the meal that results is fantastic, despite its simplicity. Do you do this too? If so, I'd love to hear about some of your creations ~ feel free to leave a link in the comments.


Whole wheat pita (or substitute white)
Tomato sauce
Shredded mozzarella
Crumbled feta
Pre-sliced cremini mushrooms
Pine nuts
Red pepper flakes

Monday, September 6, 2010

Meatless Mondays: Make-Ahead Favorite

I have a new make-ahead recipe that I love. I can't wait to have an excuse to eat it again! I made it for my graduation party and for the baby shower a few weeks ago. It's a strata, which is a dish made with bread, eggs, and cheese.


I love that stratas are hearty enough to satisfy full-time vegetarians and carnivores alike. Can you see why?


This recipe is stellar ~ it appeared on both Smitten Kitchen and Annie's Eats, two of my favorite blogs. You layer the bread, spinach mixture, and cheese in a pan much like you would layer a lasagna.


Then you pour the egg and milk mixture over the top and let it chill in the fridge overnight. The custard soaks into the bread and the flavors mingle a bit. In the morning the strata is oven-ready, making it so much easier to get brunch on the table.


And the flavor of the spinach and gruyere cheese is . . . well, yum! My mouth is watering just thinking about it.

~~~~~~~~~~~~~~~~~~~~~~~

Spinach and Cheese Strata
Adapted from Smitten Kitchen and Annie's Eats
  • 3 tbsp. unsalted butter
  • 1½ cups onion, finely chopped
  • 2 (10 oz.) packages frozen chopped spinach, thawed and well-drained
  • 1 tsp. salt, divided
  • ½ tsp. pepper, divided
  • Dash freshly grated nutmeg
  • 1 Tbsp. prepared Dijon mustard
  • 8 cups cubed French or Italian bread, cut into 1-inch cubes
  • 6 oz. coarsely grated Gruyere (about 2 cups)
  • 2 oz. finely grated Parmesan (about 2/3 cup)
  • 9 large eggs
  • 2¾ cup milk
Melt the butter in a medium skillet over medium heat. Add the onions to the pan and sauté until soft, about 5 minutes. Add ½ teaspoon of the salt, ¼ teaspoon of the pepper, and the nutmeg, and continue to cook for 1 minute more. Stir in the spinach, remove from the heat and set aside.

Butter the inside of a 2½-3 quart baking dish. Layer the bottom of the dish with one third of the bread cubes. Top with one third of the spinach mixture and one third of each of the cheeses. Repeat these layers twice more with the bread, spinach and cheese.

In a medium bowl, combine the eggs, milk, the remaining ½ teaspoon of the salt, ¼ teaspoon of the pepper, and 1 Tbsp. Dijon mustard. Whisk together until blended. Pour the mixture evenly over the bread and spinach layers in the baking dish. Cover with plastic wrap and chill for at least 8 hours or up to 1 day.

Remove from the refrigerator 30 minutes before baking. Preheat the oven to 350˚ F. Bake uncovered until puffed, golden brown and cooked through, 45-55 minutes. Let stand at least 5 minutes before serving.

Saturday, September 4, 2010

Game Prizes sans Perfume

At the baby shower I helped plan a few weeks ago I was in charge of buying or making prizes for the shower games. Since we had just as many men as women coming, my big dilemma was what exactly a "game prize" should be. My online search told me that the most appropriate shower prizes include: lotions, scented candles, sachets, and lip gloss. These options clearly wouldn't do ~ I didn't want the guys to bolt, afterall! Then I thought about chocolate, but we were already having chocolate cake and chocolate favors.

In the end I made up a double batch of my homemade salsa (recipe here), which these friends have always enjoyed.


After adding a little cuteness, I felt like I had some very respectable game prizes to offer. No makeup or girlie scents in sight!


I'm happy to report that the guys did not bolt from the party. We had an all-around great time!

Monday, August 30, 2010

Meatless Mondays: It's Time

You'll have to excuse my sparse posting recently. Instead of talking about food (and life!) I've been enjoying it. So now it's time to start catching up. In fact, I'm blogging with today's Meatless Mondays post just in the nick of time. In most parts of the U.S. it's not even Monday anymore. But who's counting anyway!

In recent weeks I have finally realized that summer is almost over. School has started for all the children here in Davis, and we've even seen a few cooler nights. Clearly it's time to prepare for Fall, but I'm not quite ready. I have yet to really enjoy the best of summer produce ~ the garden-fresh tomatoes, the locally grown sweet corn, the eggplants and bell peppers. I'm hoping to make time for all of these summer treats...and fast.

For today's Meatless Mondays post I'd like to share this luscious tomato salad. It's perfect for this time of year because it features tomatoes straight from the farmstand.


It requires zero cooking.


And, it is light enough for even the hottest of days.


I hope you enjoy it as much as we did ~ even my daughter dove headfirst into this, herbs and all!


~~~~~~~~~~~~~~~~~~~~~~

Marinated Tomato Salad

  • 2 Tbsp. balsamic vinegar
  • 1 Tbsp. extra virgin olive oil
  • 2 pints of the freshest mini tomatoes you can find (using a mixture of heirloom cherry tomatoes might make for the prettiest result)
  • 2 Tbsp. finely chopped fresh mint leaves
  • 2 Tbsp. finely chopped fresh basil leaves
  • 1/8 tsp. each of sea salt and freshly ground pepper (or more to taste)
Whisk together the vinegar and oil in the serving dish. Add the tomatoes to the dish, top with the herbs, salt, and pepper, and then toss well to coat the tomatoes. Adjust the seasonings if necessary, then chill for at least 30 minutes or up to 4 hours before serving.

Wednesday, August 11, 2010

Taco Remix 2

Do you have a favorite way to "package" up your food? Tacos are probably my favorite food package. Today's taco remix is inspired by Real Simple's 3-ingredient recipe challenge. Although I packaged up my 3-ingredient recipe inside a taco, you could easily eat this egg/green onion/cheese combo as is.


Beat 6 eggs
Lightly saute 4 green onions, sliced
Add 1/4 cup feta (or other flavorful cheese)
Season with salt and pepper
Eat as is or serve on tortillas with tomatilla salsa

Friday, August 6, 2010

Fun With Ola

Last weekend I was looking for a fun cooking project to do with my daughter. We were in the mood for something sweet, but I was hoping to avoid heating up the house with the oven. I showed my daughter a picture of homemade granola bars. Then she launched into this extended story about how her preschool friend Emily likes ola bars with chocolate chips and how her other friend Maria likes ola bars only sometimes.

Since we almost never eat granola bars around our house, this was the first time I had heard my daughter call them "ola bars." She was dumbfounded when I explained that they are actually called "granola bar." So cute!

In the end we did make a batch of granola bars. Truthfully these are somewhat of a cross between granola bars and Rice Krispie treats. They don't have granola in them, and they aren't baked like homemade granola. But they do have the flavor of granola bars with some of the same treats you would expect mixed in ~ dried fruit and chocolate chips. The cereal is more like over-sized Rice Krispies, similar to what rice cakes are made of, and I found it in bags with all the other cereals.


It was a super fun project ~ easy, very child-friendly, and SO tasty. The first time I made these I followed my penpal Emily's recipe, then last weekend I used another variation. My version is a little less sweet than the two recipes I looked at.


~~~~~~~~~~~~~~~~~~~~~~~~~~~~~~

Peanut Butter "Ola" Bars
  • 3 cups crispy rice cereal
  • 3 cups crispy kamut cereal or toasted oat cereal
  • 1 cup dried cranberries (or other small dried fruit)
  • 1/2 regular raisins
  • 1/2 cup sunflower seeds
  • 1 cup honey
  • 1 16 oz jar natural peanut butter (creamy or chunky)

Spray a 9 x 13 baking pan. Combine the cereals, raisins, and sunflower seeds in a large bowl. Place the peanut butter and honey in a microwave safe bowl and microwave briefly to soften the mixture, then stir well to combine. Pour over the cereal mixture, then mix well. Press the combined mixture into the prepared pan. Cool, cut into squares or bars, and serve.

Tuesday, July 20, 2010

Taco Remix

The bar exam is now exactly a week away ~ yikes! This is what fueled me last week since now I seem to be grabbing the camera less and less often.


Wheat tortilla
Toasted with cheese, tomato salsa, frozen bell peppers
Top with black beans
Fresh baby spinach
Pre-sliced mushrooms

Friday, July 16, 2010

Pizza Remix 2

Kitchen shortcuts can be a lifesaver, so don't be afraid to turn to the pre-chopped produce section, the canned/jarred food aisle, or even the freezer for the makings of some really great food.


Whole wheat pita
Refried beans
Tomato salsa
Shredded jack cheese
Frozen corn
Lots of black pepper
Related Posts with Thumbnails

  © Blogger template 'A Click Apart' by Ourblogtemplates.com 2008

Back to TOP